

Hi!
In today's cricut tutorial, I'm going to teach you how to make coloring pages in cricut design space!
Coloring pages are a good add-on to activity boxes! You can also use just the coloring pages and kids will have a lot of fun!
For the tutorial, I'm going to show you two ways to make coloring pages: Print and cut and Draw.
Print and cut
1. First, create a template for your coloring page. *If you purchase one of my coloring boxes, they include the coloring page template, so start with the step 3.
To create a template, go to Shapes and select the shape of your choice. I'm going to select the Square.
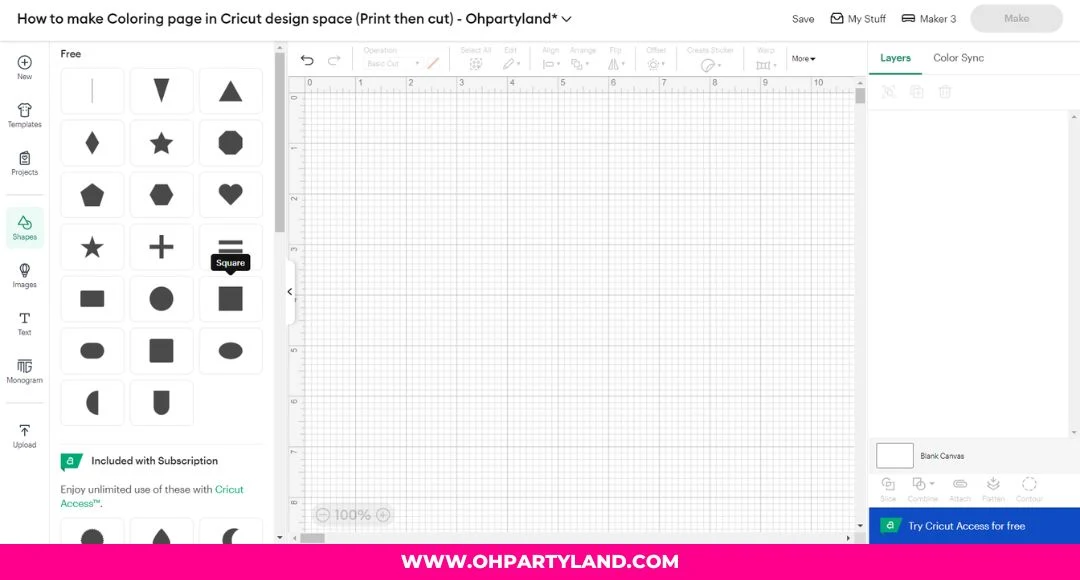.jpg "How to make coloring pages in cricut design space 1")
2. Change the color of the square to white. Also, change the size of the square to the size of your choice or to the maximum size of your paper:
Before changing the sizes, make sure the lock icon is unlocked (Just click on the lock icon).
- For letter size paper = Width: 9.32 in. Height: 6.76 in.
- For A4 size paper = Width: 9.98 in. Height: 6.53 in.
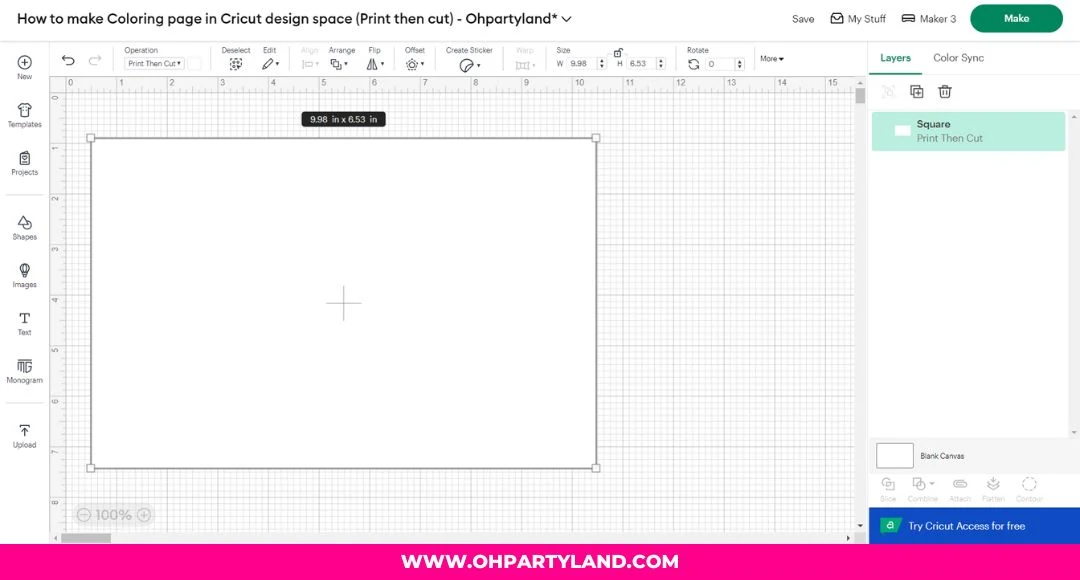.jpg "How to make coloring pages in cricut design space 2")
3. Upload a coloring page image in JPG file with white background or a coloring page in PNG file or SVG file.
I'm going to upload an image in JPG file with white background.
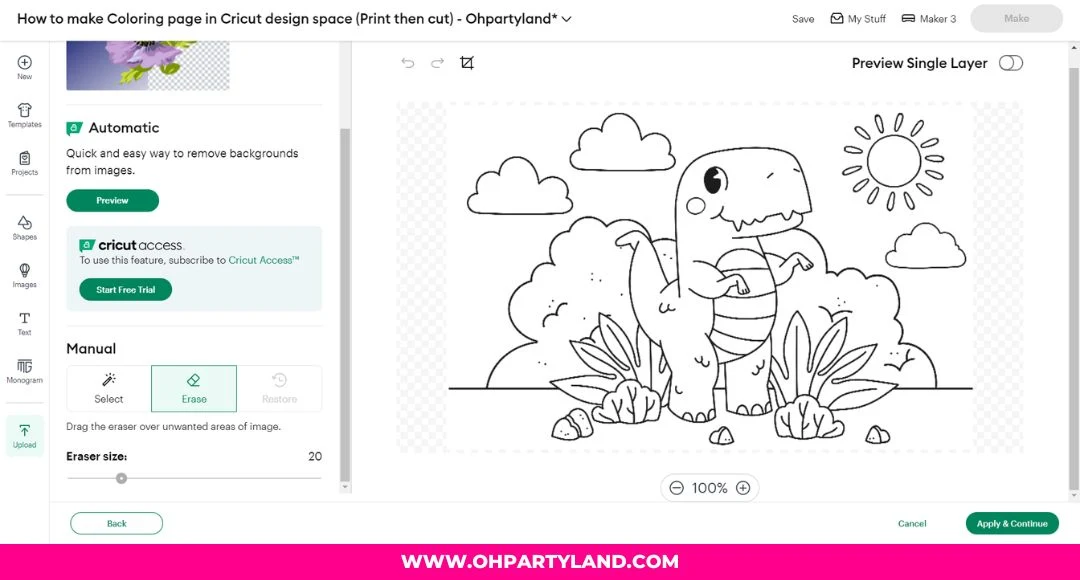.jpg "How to make coloring pages in cricut design space 3")
4. Select "Flat Graphic" and continue.
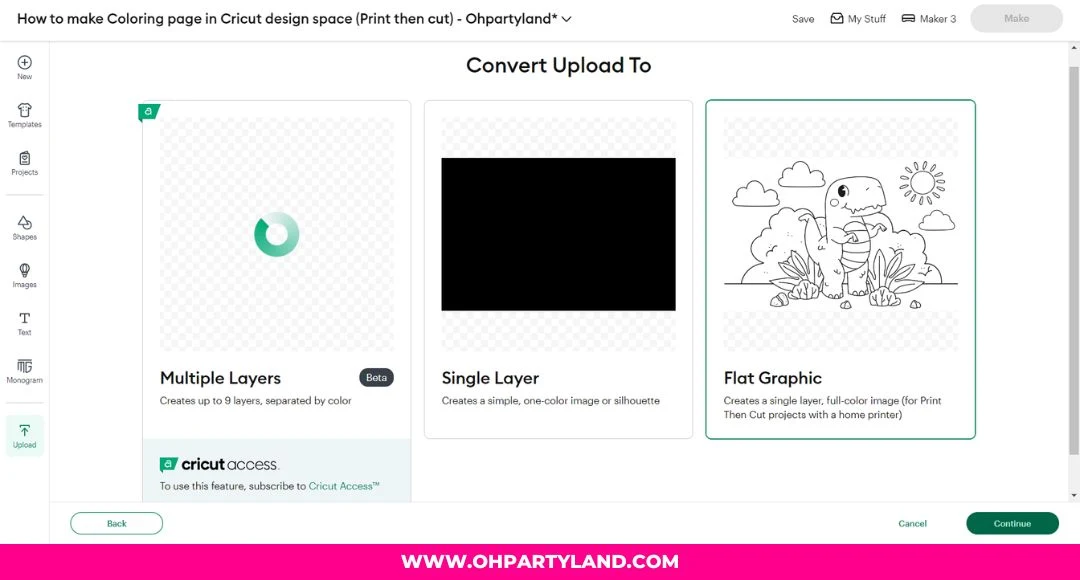.jpg "How to make coloring pages in cricut design space 4")
5. Select the image (coloring page) and make it smaller. The image must fit inside the rectangle
You can also select the coloring page and the rectangle template, then go to align and click on center.
.jpg "How to make coloring pages in cricut design space 5")
6. Make sure the coloring page and rectangle template are selected, then click on "Flatten".
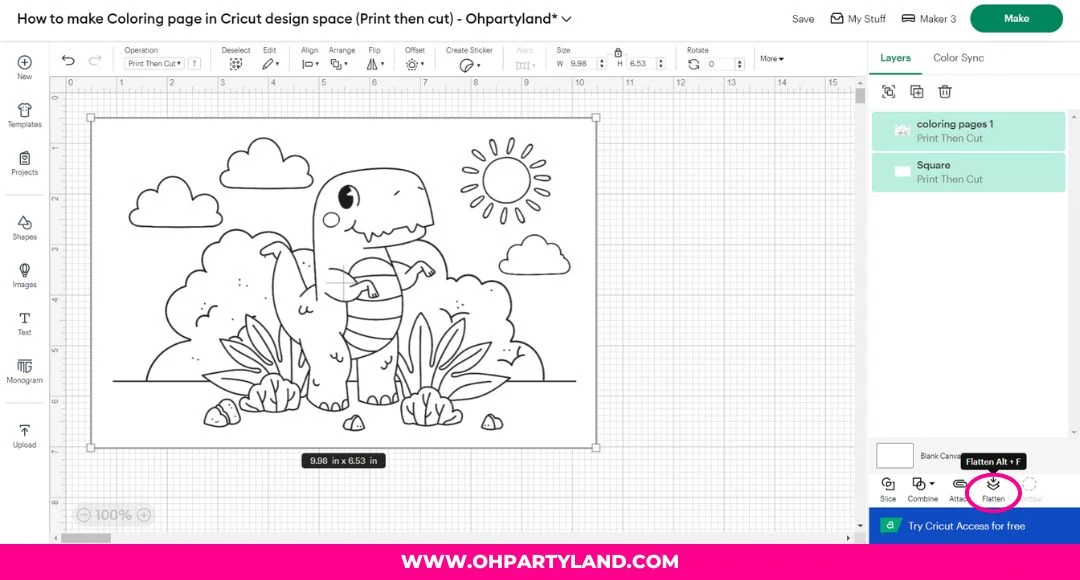.jpg "How to make coloring pages in cricut design space 6")
7. Now, you can see that is only one layer to "Print then cut".
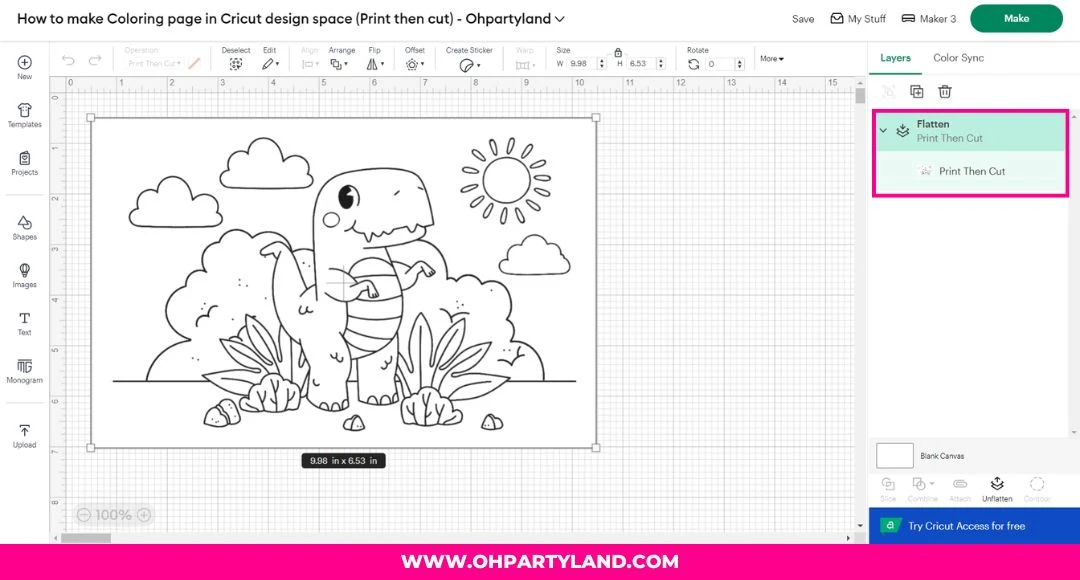.jpg "How to make coloring pages in cricut design space 7")
8. Press the "Make button" and you will see the Print then cut for the coloring page.
.jpg "How to make coloring pages in cricut design space 8")
Draw
1. Upload a coloring page image in PNG file with transparent background or SVG file. I'm going to use a PNG file for this tutorial.

2. Optional: You can go to the Manual Panel and erase over the unwanted ares of your coloring page image. Then, click on "Apply & continue" button.

3. Choose the "Single layer" option (It will create the silhouette of your coloring page). Press "Continue" and then "Apply"

4. Go to "Operation" and select "Pen"

5. Then, select your "Type of pen" and Color". I'm going to use "the Marker 1 mm" and the color "Black".

6. Optional: If you have a template for your coloring page. Make sure to fit the coloring page image inside the template. Then, attach the image and the template.

7. Press the "Make button" and it will say Pen for your coloring page. If you use the template and image for your coloring page, it will say Pen and Basic cut.
Now, your cricut machine will know where to draw and cut!

Which tutorial will you choose Print then cut or Draw?
See you in the next tutorial! 🤗


Post a Comment